
Water Experiments con't,
Today Grandma is giving you the rest of the water project to do.
Service Description
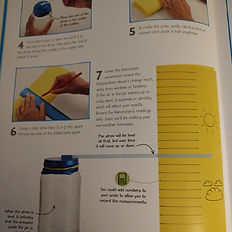
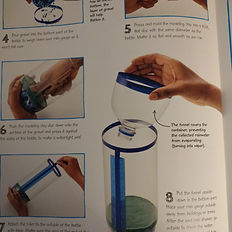
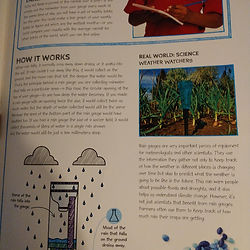
This first picture explains how important it is to know how things as a barometer work to explain weather that they make good STEM projects. This 2nd picture is into watching the weather of each position the straw of the homemade Barometer shows on the line helps them understand how to read it and predict the weather. The 3rd picture starts to show how to makes this homemade Barometer. It starts with a quart size jar, a big heavy balloon with the top cut off, a rubber band to secure over the top of the jar with the rubber band. For as the picture explains as the pressure goes down the balloon moves deeper into jar and as it goes down the balloon relaxes. When a straw is attached to the rubber balloon it moves up and down with the balloon. The 4th picture shows the straw should be taped on the top of the balloon with it sticking out straight across the top by one end of the straw. Then a paper of cards should be folded in half to stand up next to the jar and lines should be drawn 1/2(1cm) apart down the page. When the pressure in the jar changes i the straw will move up on the paper as the rubber band is pulled down. The 5th picture talks about what happens to the balloon when it is pushed down with the finger and says when the pressure in an area is high the balloon will be pushed the same way as the straw moves up on the lines called high pressure with the sun making the water molecules pull closer together and the balloon moves into the jar but when it is going to rain the molecules start to separate and the pressure goes down making the balloon move outward and the straw downward to start raining. It shows in the bottom of the picture how the high-pressure areas showing on a map are sunny areas and the lower pressure areas are those that are rainy. The 6th picture talks about collecting rain in a measurable cup as a Rain Gauge to how much rain has fallen. In the 7th picture it says how to mark a plastic bottle with a marker using the edge of the card paper to cut it 9"(10cm) down, taping the edges of each piece. The 8th picture says to put gravel in the bottom of the bottle with modeling clay spread across, taping a ruler to the outside and fitting the top upside down tight inside it setting it outside in the rain. An 8th picture talks about the different amounts of rain that falls from other areas of earth. It says to take it further keeping a record of the rain gauge to compare.


Upcoming Sessions
Contact Details
304 S May Ave lot 32, Yuma, AZ, USA
9282872157
pamela72@grandmaslearning.com